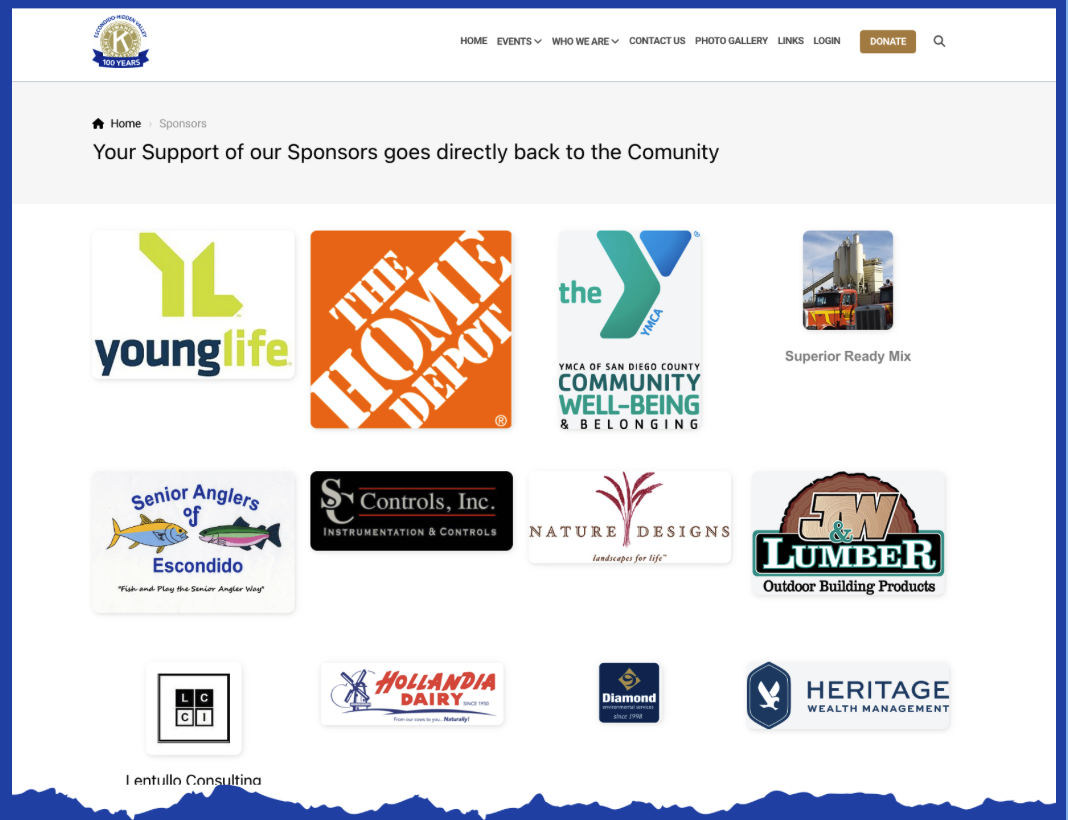
Here's a suggestion for showcasing the club's sponsor logos. This format allows for the 4 images across the page. This format is also scaleable and allows you to add additional content blocks to accommodate as many sponsors as you need. You can also link to social media or a webpage from each image, if desired.
[Credit: Kiwanis Club of Escondido - Hidden Valley]
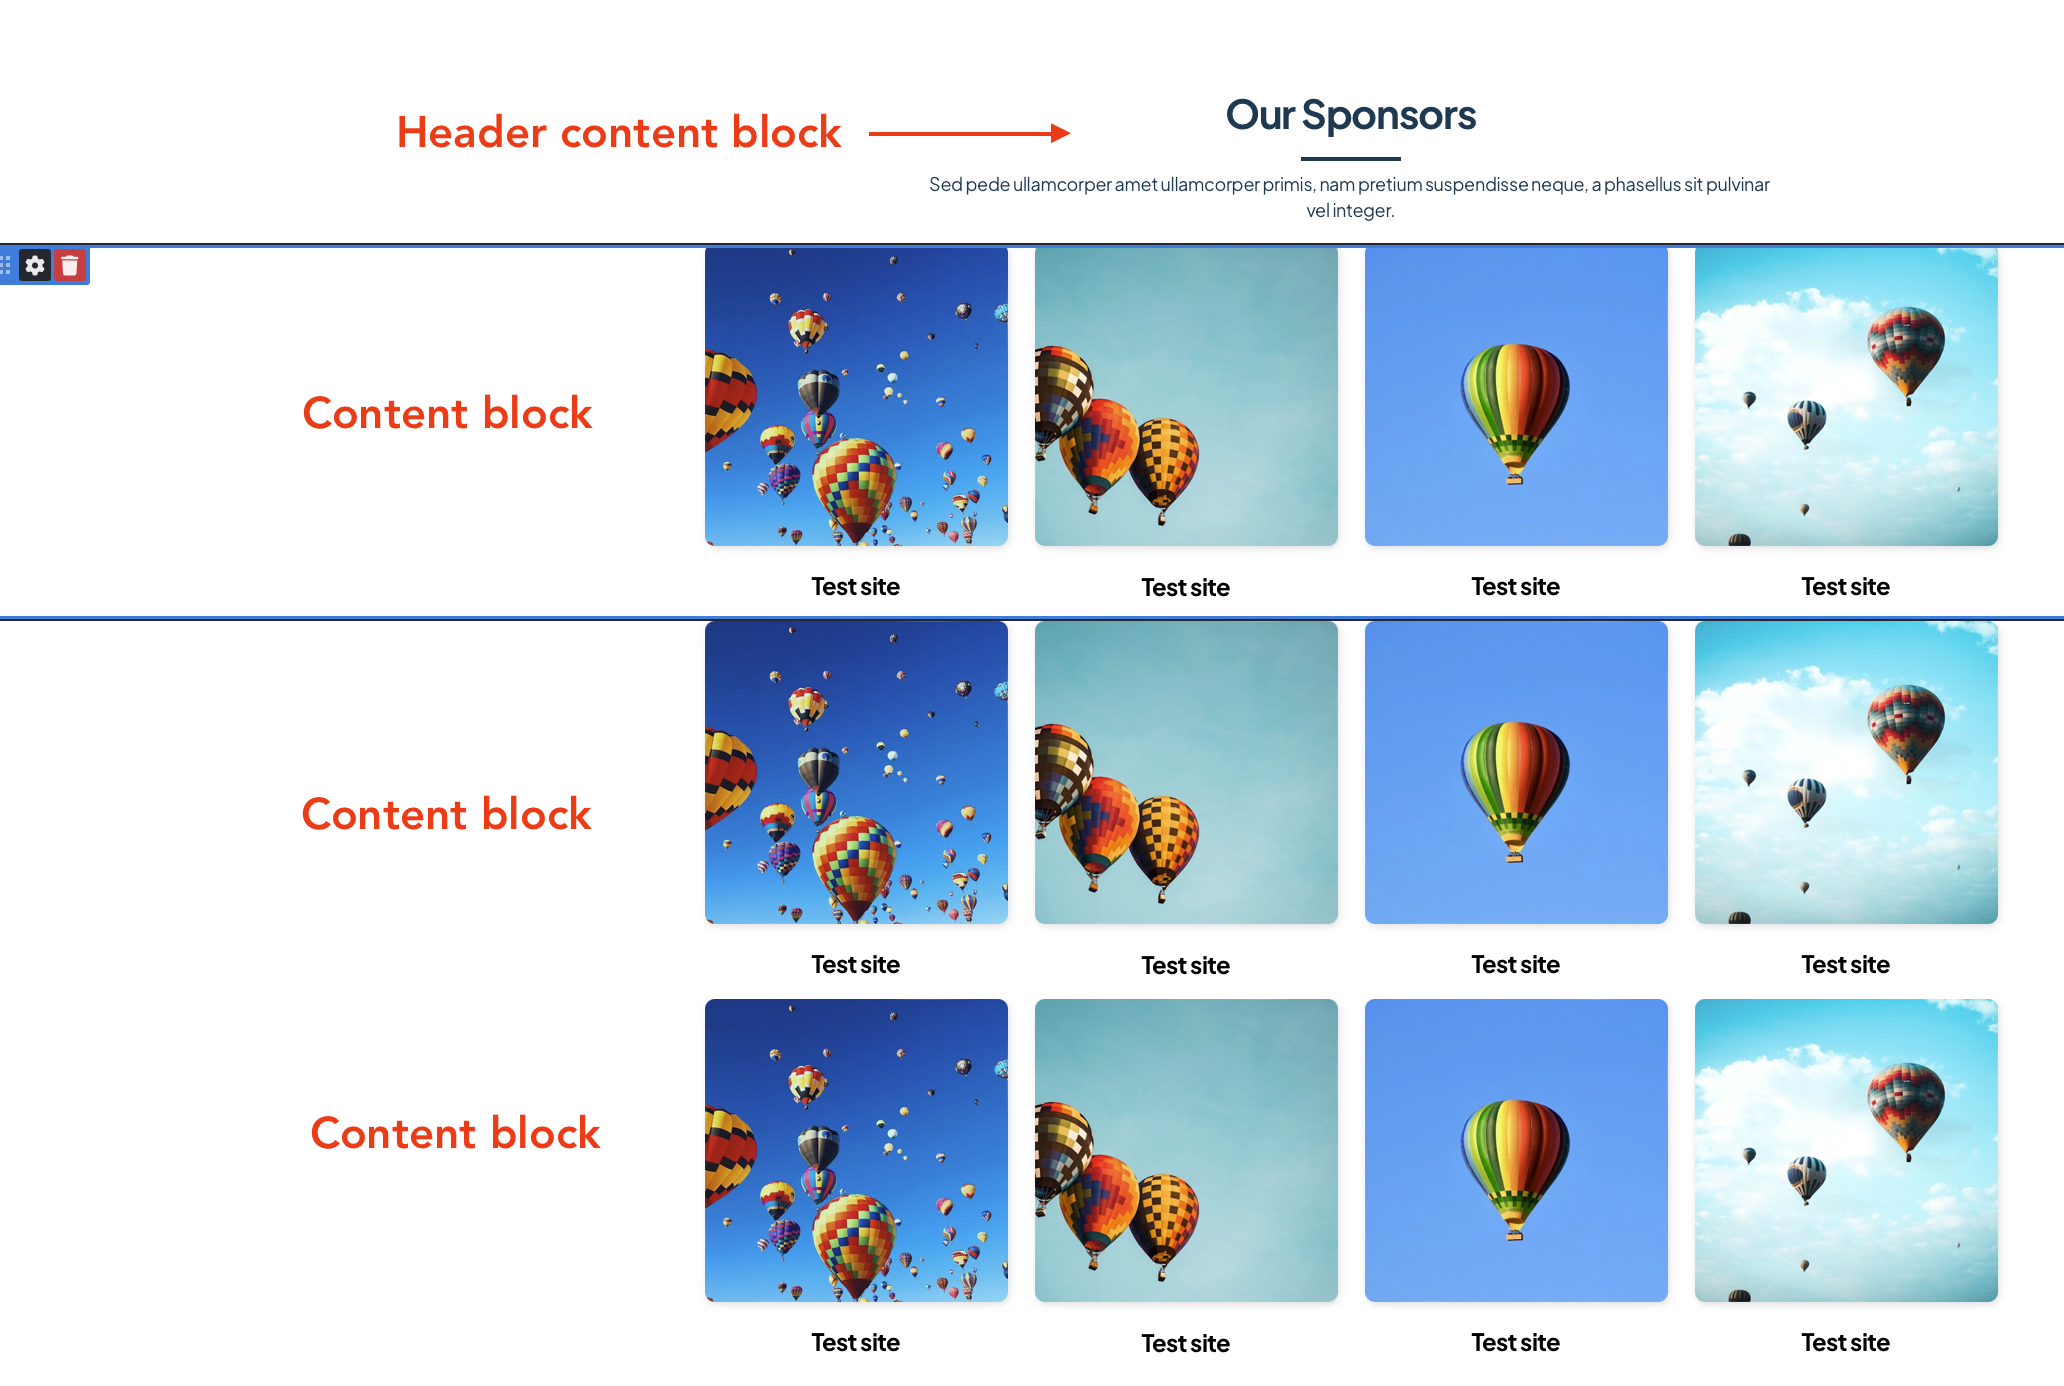
Create this look:
This webpage was easily created using Standard Content Blocks. This structure allows you to link the images or logos to websites or social media if you choose.
Here's the basic layout of the page:
Add the Header:
Click the "+ Content" button in the left navigation menu and then click "Headers". Choose the option that you would like for the header. This example shows the first header option.
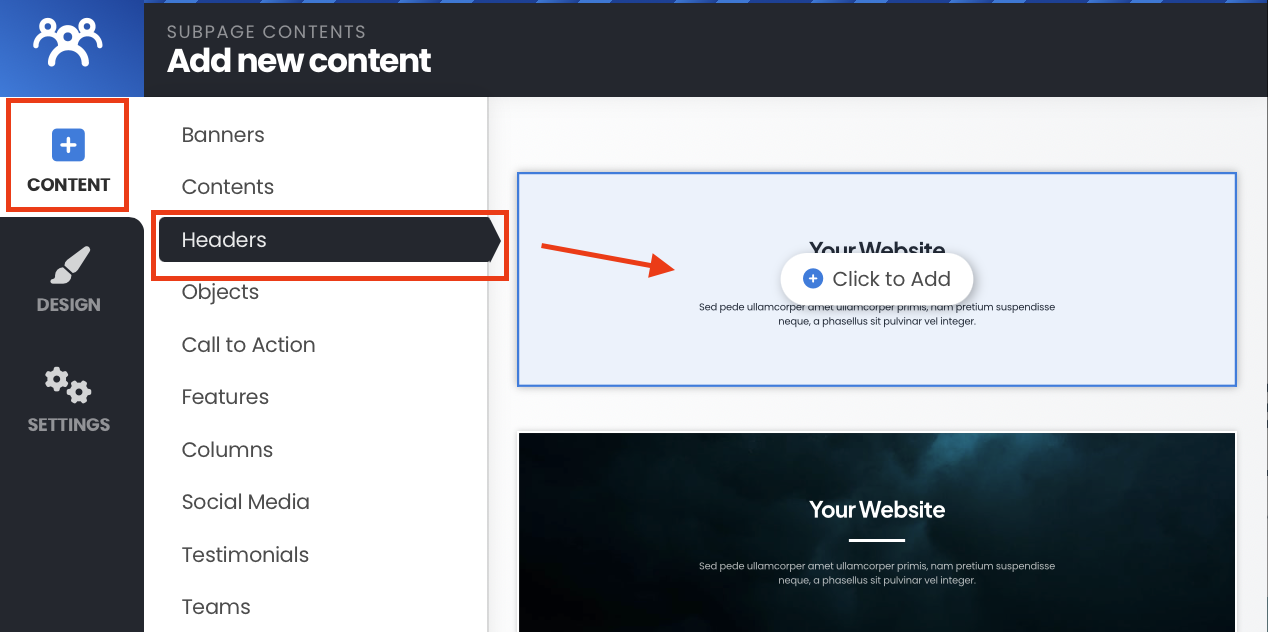
Edit the text in the header content block at this point or wait until the other content blocks are added.
Add the Sponsor Content Blocks:
Click the "+ Content" button in the left navigation menu and then click "Features". In the right column, scroll down until you see the option that shows the 4 images across (hot air balloons) with a header and text beneath each image. Choose that option.
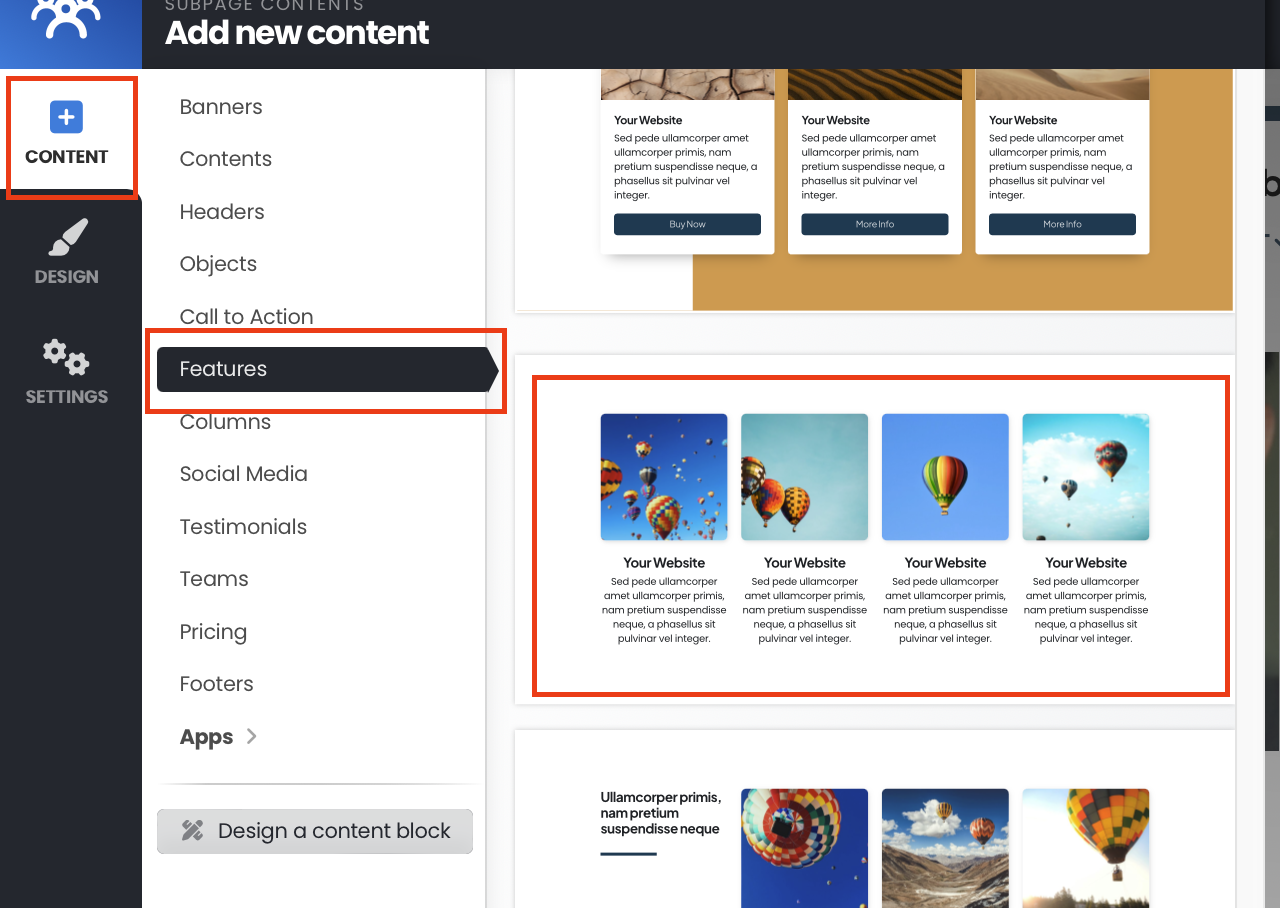
Before adding additional content blocks, edit this block so that you can easily duplicate it for the other content blocks.
Tips:
- Delete the text box from under each image.
- Leave the title text under each image. For some of the sponsor logos, you might need or want to add in the name of the company or oganization. You can individually delete the title associated with each image if not needed. However, once deleted, you will not be able to add the title back in.
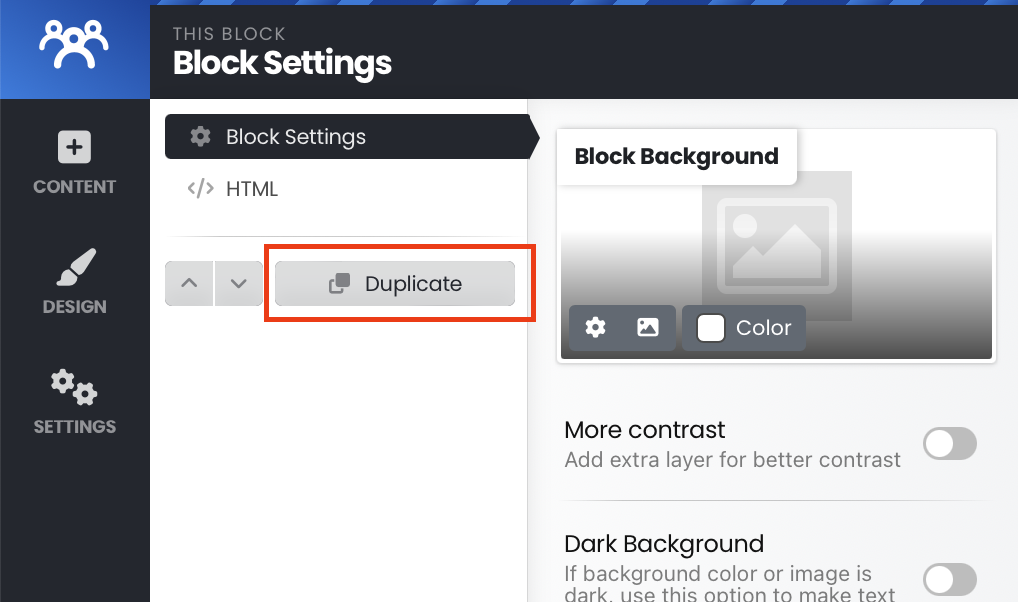
- Set the Default Block Spacing for this block so that when you duplicate it for additional rows, the spacing will be set. You can always go back and edit the spacing later, but this will save you time if you are able to set the spacing with the original content block.Next, consider how many sponsor images you would like to include on your page. If you need more than 4 images, duplicate the image content block by clicking the "gear" icon in the upper left content block menu. Under "Block Settings" click the "Duplicate" button.
Repeat Step 3 (above) as many times as needed to accommodate the number of sponsors images you need to add.
Add Sponsor Images and Links
Now the layout of your page is set! It's time to add in sponsor images or logos and link to their websites or social media, if desired.
Click the stock image shown in the content block to add the sponsor logo or image. Then click the "Image" button to upload and select the image that you need.
Once the image is chosen, select the "This is a link" button to add the sponsor link or social media in the "URL address" text box.
Tip:
Choose "Open in a new window" for each image. This allows the viewer to go to the sponsor information in a new window, but keeps your club website open so the viewer can continue perusing your club webpage.Repeat for each sponsor that you would like to add to the page.
If you have an incomplete row where you do not need 4 images across, simple delete the last image in the row by clicking on the stock image and then clicking the red "trash" icon in the lower left of the window:

Finalize the page
Take a look at the page. Play with the default spacing for the header block and the image blocks.
Check to make sure your links are working.
If you need help with images or links check out some of the other knowledge base articles about images, content blocks or links.