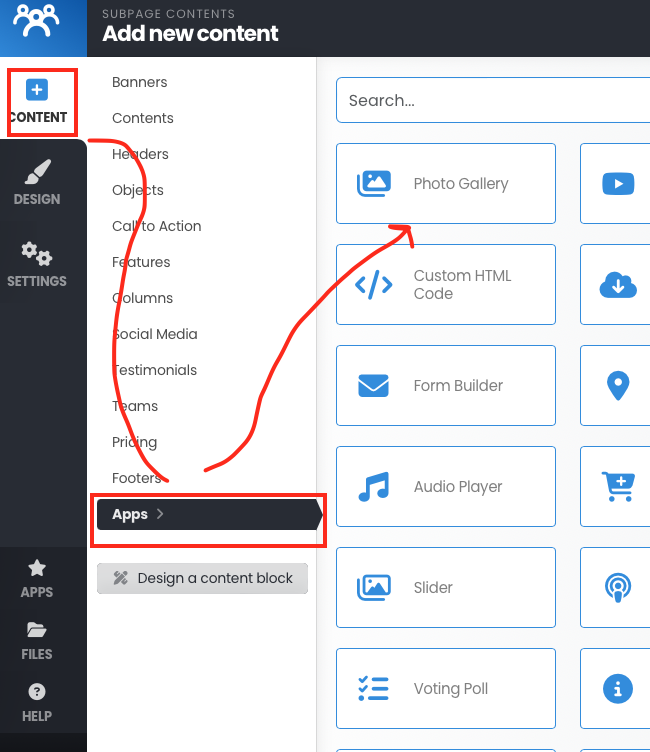
To add the photo gallery to a page, click the "+ content" icon in the left menu bar. Click Apps in the sub-menu and Photo Gallery will show at the top left. You can also find the Photo Gallery, by clicking the "Apps" button in the left menu.
Note: The "Add a photo gallery to a new page" video in the built-in help area of the web builder is outdated.
To add a photo gallery to a page -
Note: You do not need to create a subpage - you can just drop a gallery onto a page.
The "Standard" way to add a photo gallery to a page is to:
Click "+Content" in the left menu, then click "Apps", and then click "Photo Gallery" (in the top left of the next menu).
From there you can add one photo gallery, several photo galleries or all photo galleries to a page. You can "Add a new gallery".
Click "Add a new gallery".
Enter the new gallery name and then click "Add new gallery".
From there you can select a photo to add. You can add several photos at a time if you use the upload. The tool allows you to add one photo or image at a time if you select from previously uploaded images.
Here is also a built-in video that will show how to add a photo gallery:
https://www.youtube.com/watch?v=Uc31ku9Boqo